Bones and Skinning - Skinning |
||
|
The first part of the skinning is not really one since the armour parts do not need variable influences compared to the inflections of the bones. They are satisfied to follow the static movements of those. Hide the objects other than the armour parts.
|
|
We will bind ("link") the parts to the bone using the function Select And Link. |
||
|
  |
|
Bind the parts of the legs to the bone Tibia, the part of the thigh to the bone Femur, the part of shoulder to the bone Bras and the armour of bust to the bone Vertebrae 02. |
 |
|
 |
||
Activate Animation mode and advance the Animation Bar. |
||
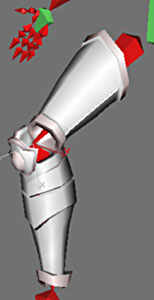
Select the Femur bone and rotate it in Local mode bend the leg as opposite, the same way for the bone Tibia.
|
|
|
 |
When we animate in max, this creates animation keys, we can view and handle them in the Track View. |
|
 |
||
|
This window represents the tree structure on the left of the screen with the handling types associated with each object (rotation, translation, scale etc). On right-hand side we see the corresponding tracks with the recorded animation keys (gray rounds). |
||
|
||
 |
As with the Schematic View we can customize the information shown, making visible only the animated and visible objects for example. |
|
By selecting the Objects icon and right clicking, chose Expand All, that allows to see all the tracks of all the animated objects. |
 |
|
With frame 0, the character is in neutral position and with the frame 1 for example the leg is bent like above. We can also select the keys and erase them. |
 |
|
 |
Now moving on to the serious things with the skinning of clothing. |
|
Place a Modifier of Editable Poly then add a Skin Modifier of to it. Thus the skinning will be made only on our object in LPM (low poly model or low definition) then smoothed at the end. |
 |
|
In Skin Modifier, add the bones which will influence the clothing. |
 |
|
Use Edit Envelopes for each bone and activate the Relative mode in Properties Envelope. |
 |
|
Before starting, some councils for skinner quiet:) The zones of influences overflow of the zone of effective influence of the bone on the mesh, also the first thing to do is put at zero the weights vertexes apart from this zone. Always ask if such vertex is logically influenced by the bone on which you regulate the weights. If this vertex is influenced only by a bone, put its weight at 1.0 and conversely put 0.0. The vertexes present on a fold generally receive 0.5 because they are influenced by exactly 2 bones. The colors of the weights are invaluable to locate the badly regulated vertexes, a point too different in color from its neighbor is inevitably badly regulated. Do not regulate the weights starting from only one position but with the whole of the positrons which this part of the skeleton can take. Finally skinning a character is a business of patience and it is here that logic in the adjustments makes shore all that becomes easy and fast. |
||
|
|
 |
|
 |
||
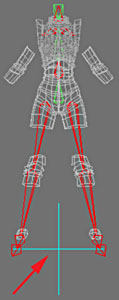
Select each bone and adjust their zone of influence, by convenience, enter of the whole values and give the same values to the symmetrical bones |
||
 |
 |
|
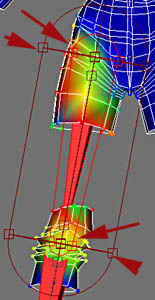
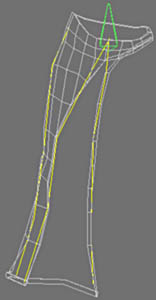
Zones of influences of the bones for clothing. |
||
 |
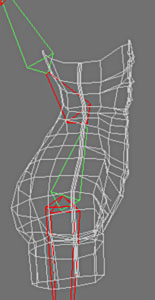
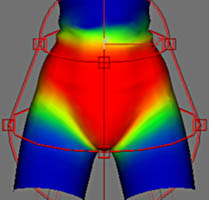
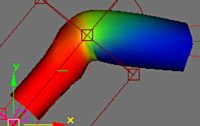
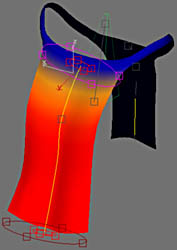
Viewing frame 1, we can already see how clothing reacts to the skinning. We can now start to refine the weights vertexes |
|
|
|
|
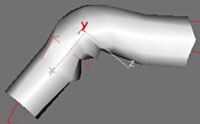
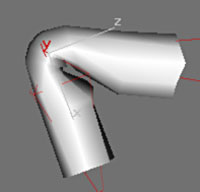
Adjustments finished with two positions, one to 50% and the other at 100% of inflection.
It will be always be thus in the continuation of the skinning for the bones between two articulations. |
||
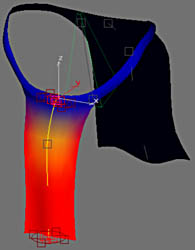
Note that the limit of influence coincides well with the place on the level of the hips. |
 |
|
 |
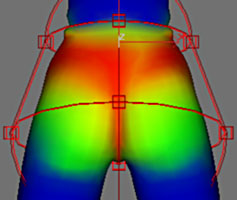
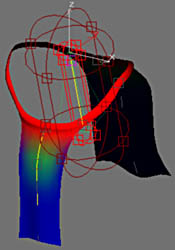
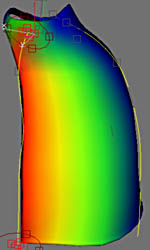
The influence on the posterior one covers all the buttock. |
|
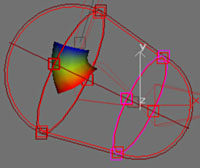
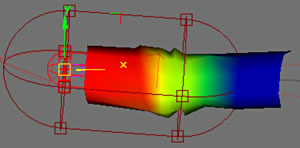
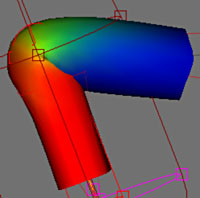
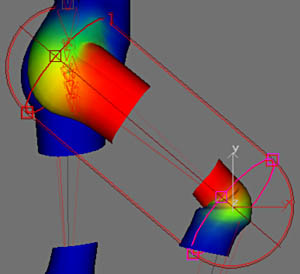
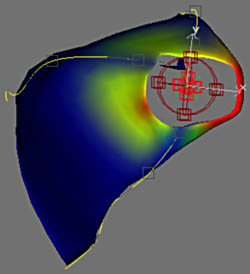
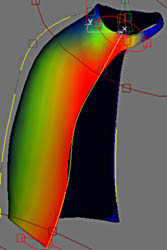
P our ankle, the lowest band of vertex receives 100% of influence, the band of the medium 50% and that the top 0%. An academic case all things considered for an articulation:) |
 |
|
|
For the arm, before beginning the skinning, make a rotation with the joint of the shoulder to put the arm in the horizontal.
Select them and adjust the weights to make them follow the corresponding bones. |
|
 |
||
 |
 |
|
Top create two positions with frame 1 and 2 for example, start the adjustment of the weights and finalize them. |
||
|
 |
|
|
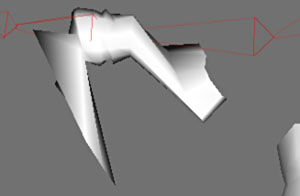
Adjust the weights to have a harmonious folding. We can check the skinning after smoothing by activating Show End Result on the level of Modifying Skin and by putting the iteration of smoothing at 1 in Meshsmooth. It is ill advised to use skin smoothing because the vertexes of the LPM do not follow the inflections |
||
Start again for the other side with dimensions, max proposing symmetry of skinning that is a pity. |
||
 |
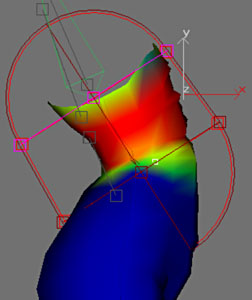
With the tower of the spinal column, rotate of the bone Vertebra 01. |
|
 |
 |
|
And adjusted weights. |
||
 |
 |
|
The influence of the bone Vertebra 01, on the hips. Note the symmetry of the influences, which makes it possible to check that the skinning is correct. |
||
 |
 |
|
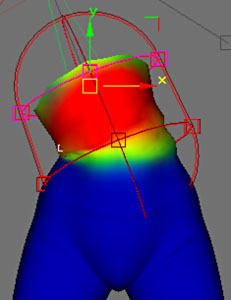
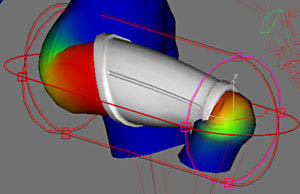
Even with the bone Vertebra 02. We can view the armour of the bust for see whether that sticks well. |
||

|
Once we totality skinned the clothing, select the Root and move it. Normally all the vertexes of clothing should follow the Root in its displacement. If necessary certain vertexes that are not influenced at 100% by bones, should be adjusted so that is the case. Make this checking after each end of skinning on the following objects. |
|
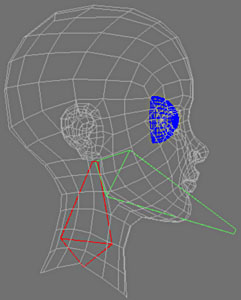
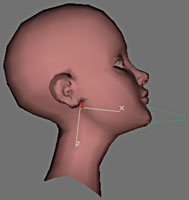
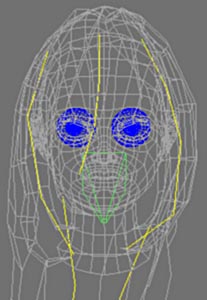
And now the head.
Begin with linking the eyes to the Face bone (in green). |
 |
|
 |
 |
|
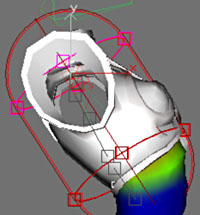
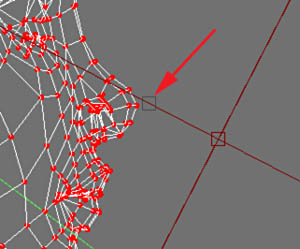
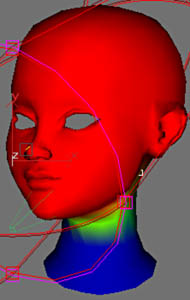
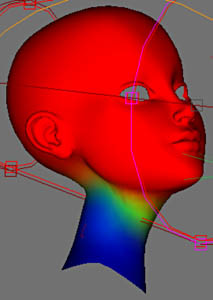
For the head we can trim the work of skinning well by moving the zone of influence of the Face bone as above, by moving the reference marks in gray. Indeed the zone of influence of anything is not centered on the bone even that is quite practical sometimes. |
||
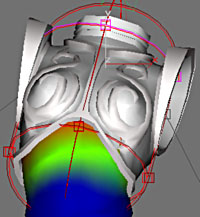
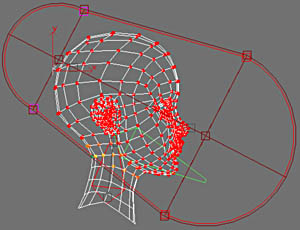
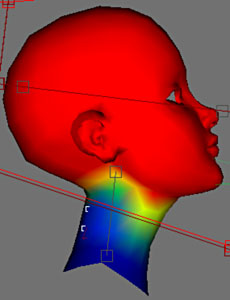
Adjust the zone of influence of the bone Vertebrae 03 as opposite. |
 |
|
 |
 |
 |
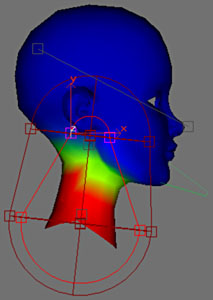
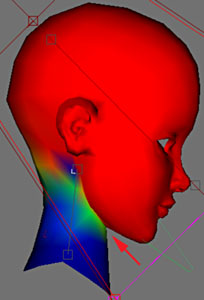
Make two rotations, one tilted back and the other tilted forward with the frame 1 and 2 for example. By making the adjustments for with dimensions and by selecting the vertexes two to two in right-angled selection we adjust the weights in a symmetrical way. |
 |
|
|
|
||
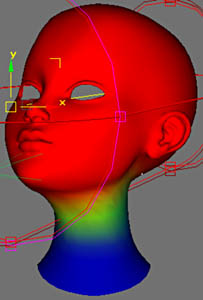
Let us rotate the head right and inclined to check that all occurs normally Of course for an optimal result it would be necessary to have more bones for the vertebrae but here it is sufficient with the armour and the hair covering. |
 |
|
 |
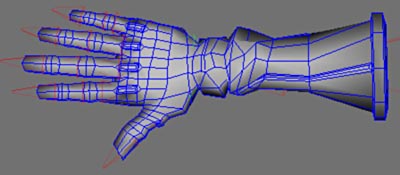
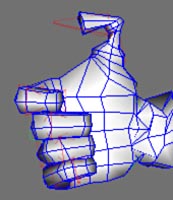
A large piece now with the glove and especially all the fingers.. |
|
 |
||
|
Then rotate the shoulder, bring the arm to horizontal to the frame 1 by ex. |
||
 |
||
 |
||
|
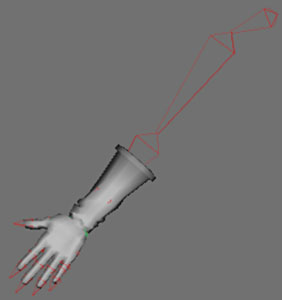
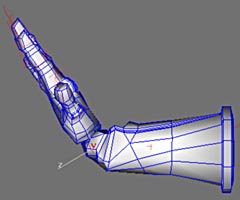
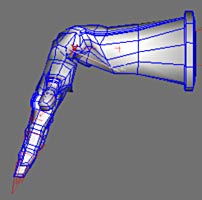
Then carry out a rotation of 45° on the bone Before Bras 2 and the same thing on the bone Main. That makes it possible to place the hand horizontally, it is more practical to observe during skinning. |
||
 |
||
 |
||
|
||
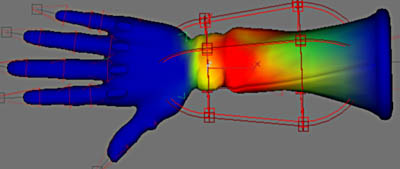
This rotational movement of before arm is called the pronation.
Adjust the weights to have a regular torsion on the glove. |
||

 |
 |
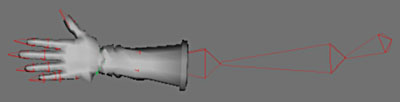
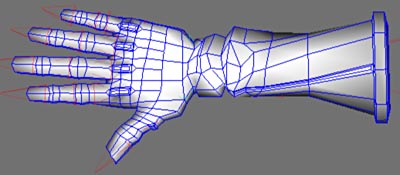
Turn the wrist to show a raised and lowered position of the hand. |
|
|
 |
For the moment we deal only with the adjustment of the vertexes of the wrist and we leave the remainder of the vertexes influenced by the Main bone just as they are. |
|
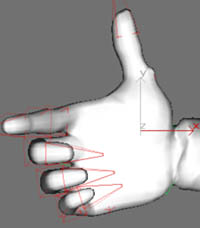
Adjustment of a Finger. For this it is necessary to make 3 frames each time an inflection is used. |
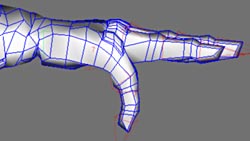   |
 |
 |
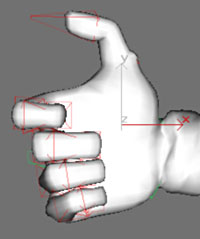
Adjust in each frame the weights vertexes. This principle is valid for the 3 other fingers, annular, major and index. |
|
|
|
 |
 |
 |
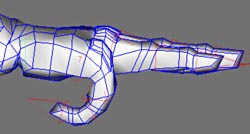
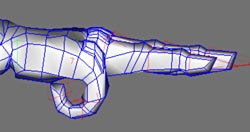
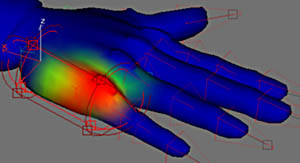
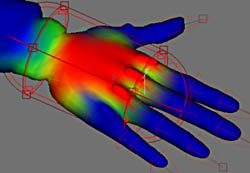
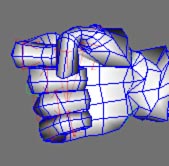
The skinning of the 4 finished fingers. |
|
 |
 |
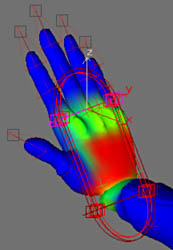
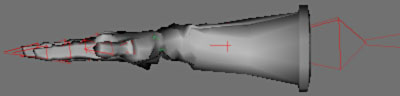
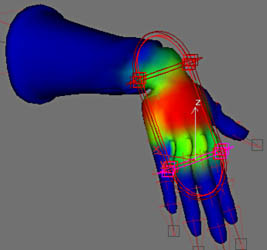
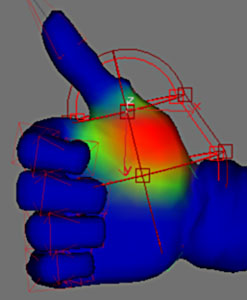
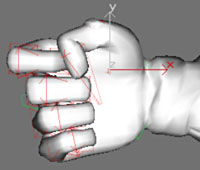
Aspect of the influence of the Hand bone once all fingers are skinned. |
|
 |
 |
 |
 |
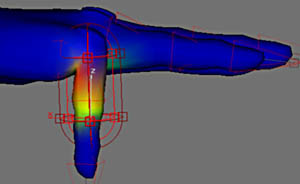
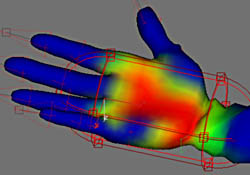
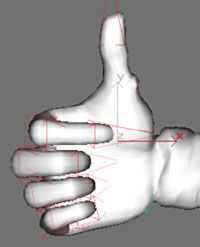
With the thumb now with 4 frames for 4 orientations of the phalanges. |
|
 |
 |
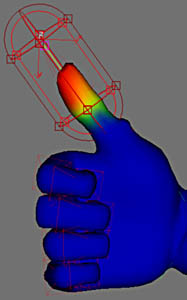 |
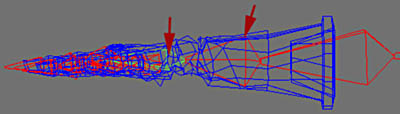
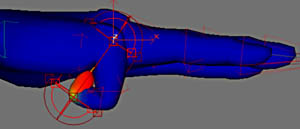
Zones of respective influences of the three bones of the thumb. |
 |
 |
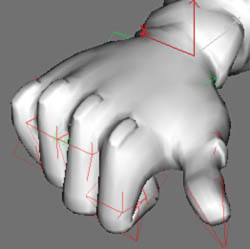
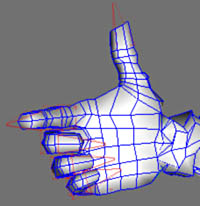
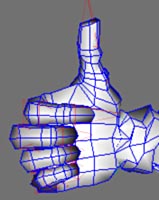
Corresponding adjustments. It is illusionary with so few bones to remake a perfectly moving hand but it is an acceptable approach. |
|
 |
 |
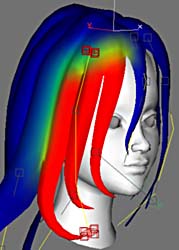
Now we will skin the wicks of the hair to be able to adjust those when the head turns. Thus here the splines remain elastic, it is thus necessary to take guard not not have too much stretch in the mesh during displacement of their control points. Make shore skin is applied to the hair. |
 |
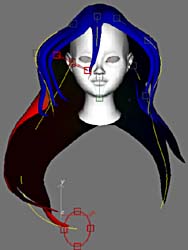  |
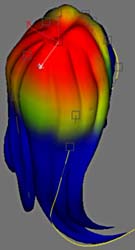
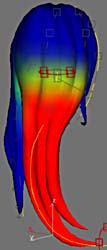
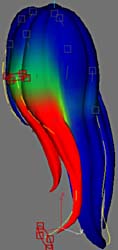
To easily regulate the influences of the splines on the hair, advance of a frame and draw aside the splines (as if there were wind in hair:) It is then enough to review the influences bone by bone to have a coherent skinning. |
   |
|
   |
|
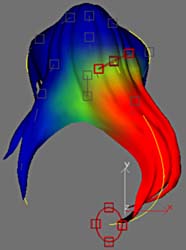
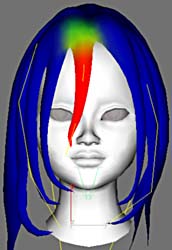
Aspect of the influences according to the 4 bones splines and the bone Head (frame of reference 0). |
|
 |
The skinning of the second belt is fast since the spline influence to 100% all the vertexes. |
   |
|
|
The loincloth with both bones splines and the bone Vertebra 01 (hips) |
|
The top of the skirt, with the bone Vertebra 01 for the influence to the size and the 3 bones splines. |
 |
 |
  |
As with the hair, advance a frame and inflate the skirt by moving the vertexes of the splines to adjust their influences. |
 |
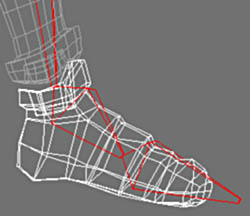 |
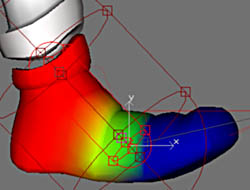
Let us finish the skinning with the shoe. |
 |
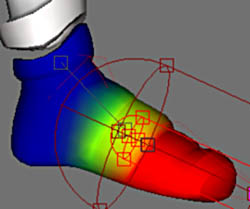 |
Two bones, ankle and the foot share the influence as shown above, a formality now:) |
|
And here we are the tutorial of Joan reaches its end, all that remains is for you to make a pretty pose. Finish the part on textures, when I find my monitor 19" and not the 15" with the doubtful colors which I currently have:) |
|