Shag Hair |
||
With this tutorial, we will have fun posing hair on a sphere and discover the many parameters of the Shag Hair plugin... (intergrated in 3DS since version 9) Functions of Shag Hair Plugin can be found at Digimation |
||
|
To start, create a sphere with a radius of 100 (Generic unit in Customize/Unit Setup...)and with 32 segments of division. Add a spot to light the scene. |
|
 |
Apply a Spherical UVW Map. This leaves us with an Editable Mesh. |
|
 |
We will create a single hair, the prototype of all the hairs that will be to added procedurally by Shag Hair... Edit this Spline and Convert all three points into Smooth points. |
|
Apply a modifier of Model Hair (in the Modifiers list) to the hair object.
For the moment we will not change any parameters of Model Hair. |
||
 |
Open the Environment Rendering panel.A window appears and in the Atmosphere selector click Add...
It must be placed below Shag: Hair. It should be noted that we can use as many Effects as needed. This is practical when we uses several types of "hair" (hair, eyebrow etc)... |
|
 |
To select Shag: Hair in the Effects window. In Emitters click on Select and select the sphere object and in Model Hairs, the hair object. |
|
 |
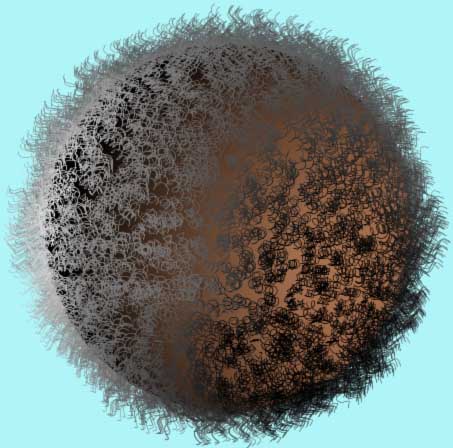
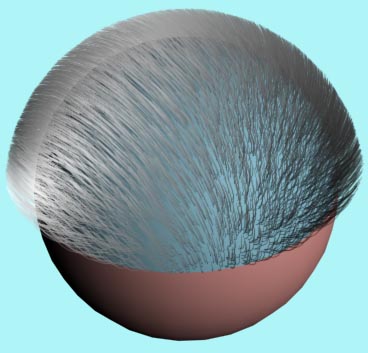
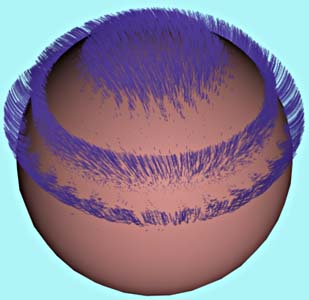
Shag Hair then creates a new object, SH_sphere01, this coarsely represents the aspect of the hair. Choose Perspective view and Render this view.
|
|
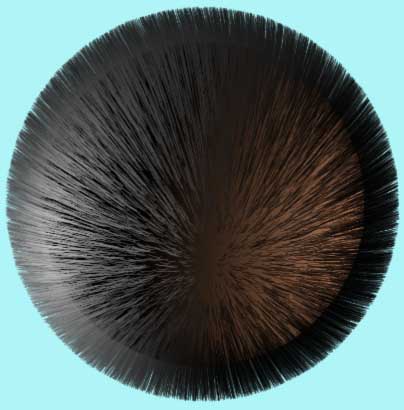 |
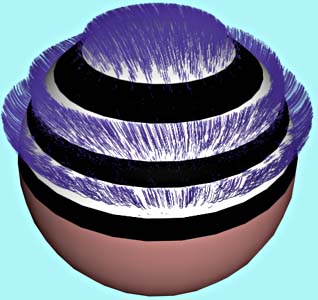
Our result from the default settings of Shag Hair. At present, we will keep the default settings of the plugin. |
|
 |
In the top of the Parameters box are the values giving the physical characteristics of the hair. Random Factor : random coefficient variation of length. For the Density density : Per Area : coefficient of density for the unit of the emission zone. The density is constant whatever the size of the faces. Attention, density strongly influences the computing time and RAM necessary. |
|
|
For the Thickness thickness : Again this increases significantly the computing time. |
||
Many of the parameters, can indicate a Shag Material ID which will contain the information from a bitmap coded at 256 levels of gray.
In this case, it is necessary to tick the box SubMat ID and to assign a Multi/Sub-Object Material corresponding to the Emitter object. It is then easy to make a finely represented texture establishing the length, density, etc... of the hair. |
||
In addition to all that, we can change certain parameters according to the length. It is the small button To activate this function, just click the button above and it becomes |
||
 |
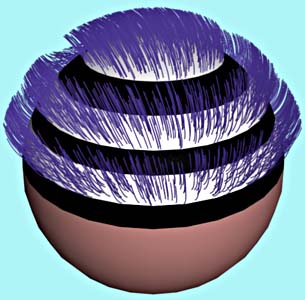
By right clicking the top button we get a window in which we can change the parameters according to the length of the hair. We can also vary the loop radius according to the length... |
|
 |
Change the values hilghted, Choose Perspective view and Render. |
|
 |
||
And here are effects of our modification! Now that we have looked at these first parameters we can attack the others... |
||
After seeing the basic functions, we will see how to use Materials ID to control the emission zones of the hair parameters with bitmap textures... |
||
|
Before starting, erase the hair created by Shag in the preceding page (object HS _ * *) also erase the entry Shag Hair in the Environment window.
|
|
 |
In Surface Properties modify Mesh Edit, and assign Material ID 2. By default the remainder of the sphere has Material ID to 1 assigned to it.
The 1st will have the color of the sphere at the time it started, the 2nd will define the establishment of the hair and the 3rd their lengths. Assign this material to the sphere. |
|
 |
||
 |
The sphere must have this aspect with the two zones, corresponding to Material ID 1 and 2. (do not to forget to get out of Sub-Object mode before assigning our new Material) |
|
 |
In Environment/Atmosphere add the Effects Shag Hair, Shag Render and assign the sphere its Emitters and hair in Model Hairs. |
|
 |
Shag Hair creates the SH_sphere01 object representing the hair. |
|
 |
||
 |
Click on Face Level, a window appears, select By Sub-Material ID 2. Now Shag Hair knows that it is zoned to Material ID 2 which is the zone transmitter of the hair. |
|
 |
Rendered with the default settings of Shag Hair. (Sphere radius of 100 Generic units and 32 segments)
|
|
 |
|
|
|
Create a texture similar to that shown above left and apply a Cylindrical UV Map to Material ID 2. |
||
 |
||
 |
Put the following parameters into Shag Hair. Length Multiplier, activate and put a 2 in SubMat ID. The length of the hair is now a function of the texture contained in Material ID 2. White, hair normal, black absence of hair. |
|
 |
Apply a rather conspicuous texture to the SH_sphere01 object to see the hair well. Normally we would have activated SubMat ID in Density to establish the same hair. Nevertheless some hairs have appeared in the black zones (bug?). |
|
 |
 |
|
With this texture, we controls the length of the hair. |
||
 |
In addition to choosing the zones where the hairs appear, we control their length graphically also.
|
|
 |
In Material Editor, add a sub-material by clicking on Set Number. To copy the same color as the ID 1 (drag and drop then Copy). |
|
 |
 |
|
Select the sphere, and Polygon mode, select the faces having ID 2 (Select by ID) and replace them with the ID 4. In the Perspective view, there are no more Shag hair points with Material ID 2 and the sphere has a uniform color. In Shag Hair, click on Face Level and replace the 2 with 4, the hair will reappear in the Perspective view. |
||
 |
Final Render... |
|
There are still some very useful functions, presented on the next page... |
||
|
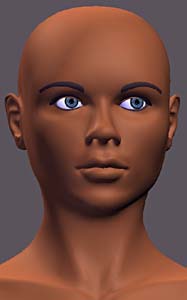
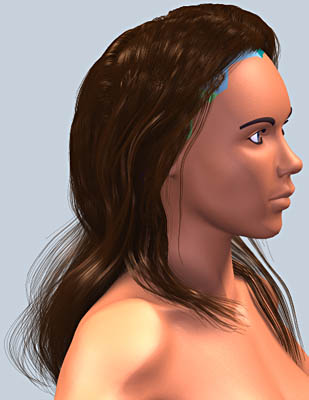
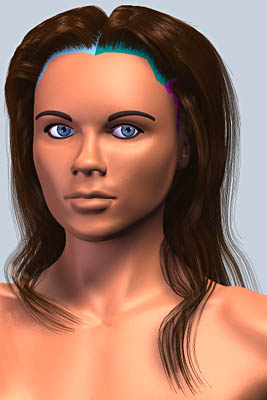
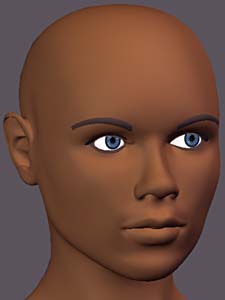
For this tutorial on Shag Hair, we will give hair to poor Dina, she is so cold... |
|
|
Start, by creating a Multi/Sub-Object material which we assign to the model. ID 1 is for the texture of generic procedural skin. For the moment only the basic color is active. ID 2 will define the storage area of the hair on cranium. A texture bitmap in gray levels will give Shag Hair the indication of length and density of the hair. |
|
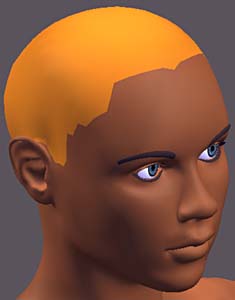 |
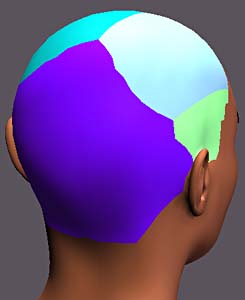
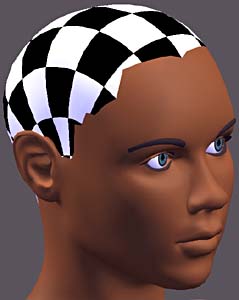
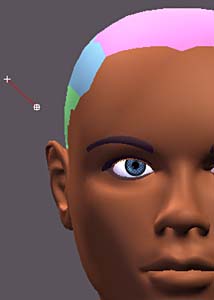
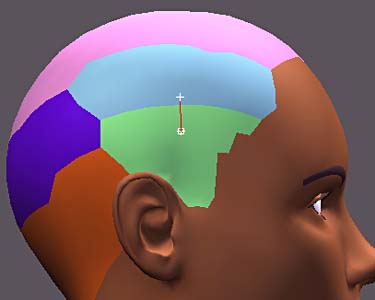
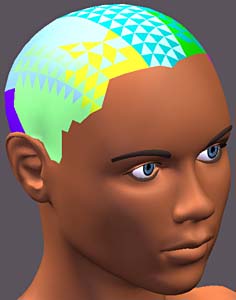
The faces representing the zone of the hair are selected and assigned ID 2. |
|
 |
In the ID 2, we define a texture of the material in the Diffuse channel. This will make it possible to adjust the storage areas mapping easily. |
|
 |
 |
|
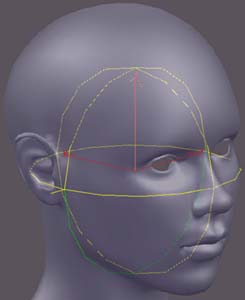
With UVW Map, the co-ordinates of texture is adjusted. Here we use a spherical projection, the gizmo is directed to give the best possible result... |
||
 |
||
A plugin such as Texporter makes it possible to recover the UV of a bitmap at the size of your choice, which will be used as gauge in Photoshop to carry out the establishing texture. |
||
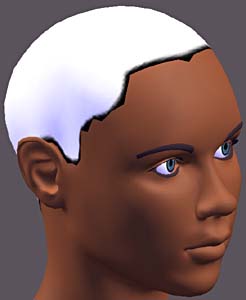 |
The texture of Checker is replaced by establishing texture bitmap. Information of the establishment will be resolved only at the end, when all the hair wicks are in place. |
|
 |
|
|
|
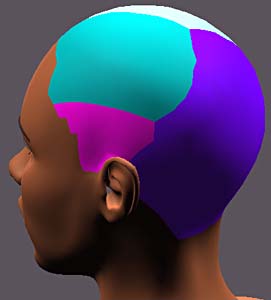
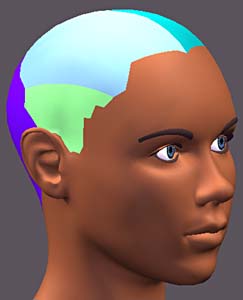
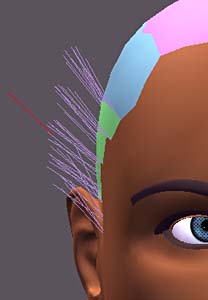
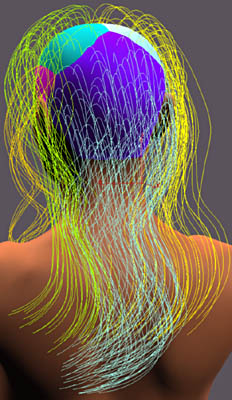
The following stage consists of cutting out the zone of material ID 2 (storage area of the hair) in several emission zones of the hair for Shag Hair.
All of the zones thus make it possible to carry out a hairstyle more complex than with only one zone. Nevertheless, it is necessary to take care not not to define zones, that increasing the time of
|
|
 |
||
 |
||
 |
||
|
One now will give the shape of the hair a zone of material ID 3. |
||
 |
 |
|
|
We apply the Model Hair modifier to the object "Hair temple G". Leave the default options. The orientation of the hair will take up the challenge according to the normals mesh (Mesh Vertex, Normal).
Emitter is the "* * * Dina HD" object. Finally we select Model Hair "Hair temple G". |
|
 |
||
 |
For the parameters, this depends on the size of the object, also it is recommended to leave the default values at first. See the counters adjustments in this case.
The base of the hair has Strand Vertex and in the medium hair has Middle Strand. |
|
 |
||
 |
 |
|
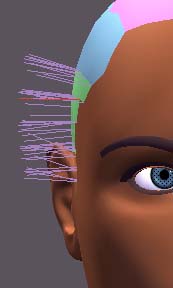
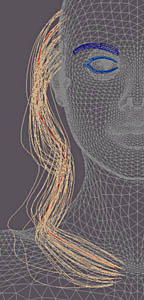
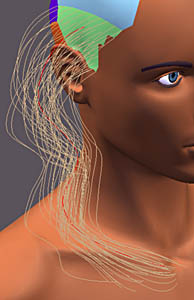
To facilitate the adjustment, and orientation of the hair it is necessary to align the hair models "Hair temple G" with the general frame of reference, here according to the normals of the faces of the mesh. |
||
 |
||
 |
 |
|
To modify the shape of the hair. Select the starting spline, in the stack and add vertexes with the Refine function and move them. That functions well but we notice a little anarchistic hair... |
||
 |
||
 |
||
 |
 |
|
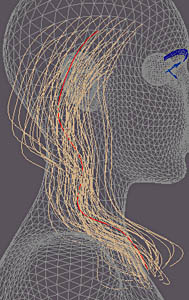
In the Influences, Options of the Model Hair, activate Attraction and regulate it so that we see this throughout the length of the pilot hair. The hair then tends to gather and follow the pilot hair. Add noise so as to give the hair more disorder. Finally the parameter Absolute Direction is adjusted to finish gathering the wicks. |
||
 |
Unfortunately the hair does not take account of the mesh and it is necessary to manually change our settings so that the hair sits on the mesh.
It is possible with the activation of dynamics to animate the hair, that we will do on the next page... |
|
In the following page, one will supplement hair and will regulate the parameters for returned... |
|
|
See above the material employed for the hair with the special Hair Shader. |
||
 |
In the options of the Shag Hair roll-up, Shading, Geometry, Quality, activate Shade Bezier Segments this improves the quality of the reflections on the hair. We can still improve by also activating the Shade Middle Strands but that lengthens the Render time. You may use this for your final render. |
|
 |
In Effect Shag Render, to accelerate render time we can lower Quality&Memory (of the default 6.0 to 3.0). For a simple preview we can also turn off Hair-Object Shadows and Hair-Hair Shadows. Finally do not forget to convert the lights to normal max lights "Hair" by selecting them and while clicking on Make Hair Enabled Lights. |
|
 |
Here three lamps light the scene. It should be noted that each added light extends the computing and pre-process times of Shag Render. |
|
 |
 |
|
 |
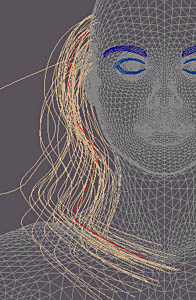
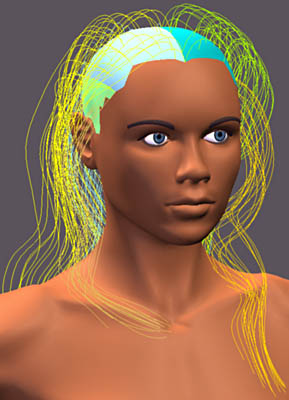
For the remainder of hair, use the method that is on the preceding page.
We can regulate the density of splines Shown in the viewport while going into the roll-up Shading, Geometry, Quality of Effect Shag Hair (from 0 to 100)
|
|
 |
||
 |
|
|
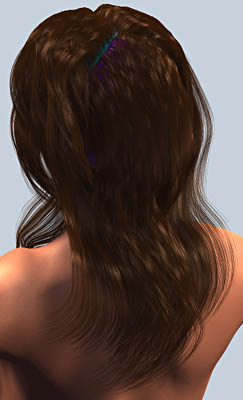 |
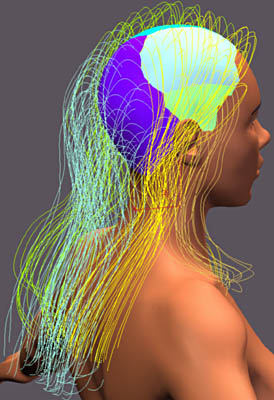
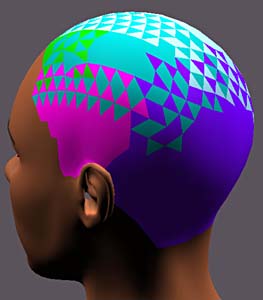
Returned settings taking into account the storage area bitmap. Now it is necessary to mix material IDs between the joints to avoid the brutal cuts between zones of Shag Hair.
|
|
 |
 |
|
Seen above overlapping zones Shag Hair.
|
||
 |
 |
|
Skin texture of material ID 1 is copied by dragging and dropping from the 1st material ID. |
||
 |
 |
|
|
Click on the images to see them enlarged. |
|