Modeling of the Ear |
||||
 |
Modelling an ear is a little daunting because it is undoubtedly the part of the human body with the most characteristic details.
However it is not so complicated if broken down step by step As usual a drawing allows to locate the details with for modelling There are no two ears identical but they all have approximately the same characteristic details. |
|||
|
||||
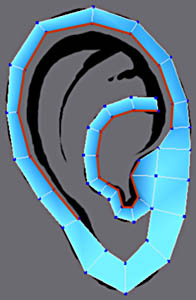
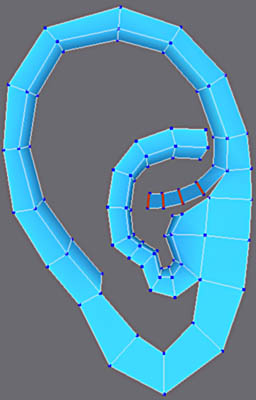
As usual, put the image on a rectangular face.
This time as for the head, one starts from a simple rectangular face starting from a shape Rectangle converted into Mesh. Extrude the edge to form the circumference of the ear by selecting a edge and moving whilst holding the shift key. Join the band together using Weld on the vertices |
||||
 |
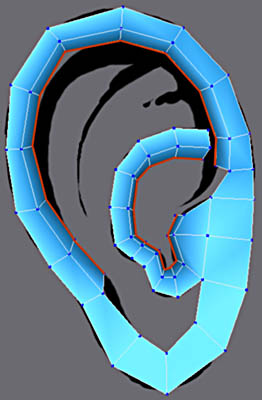
In the same way for the interior part.
Select two edges and extrude them. |
|||
|
||||
Select the edges like on the left and perpendicularly extrude towards the interior, then make a uniform scale to make the additional sections smaller as shown. |
||||
|
||||
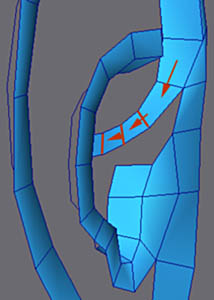
Extrusion of the "slope", this part connects the external edge with my hollow part of the ear. Extrude for the dimensions shown then adjust the vertecies to make the slope. |
||||
|
||||
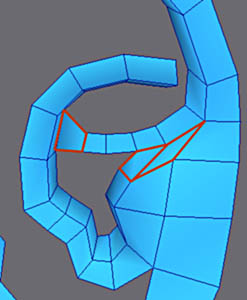
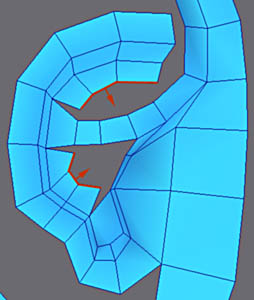
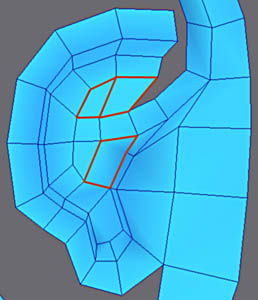
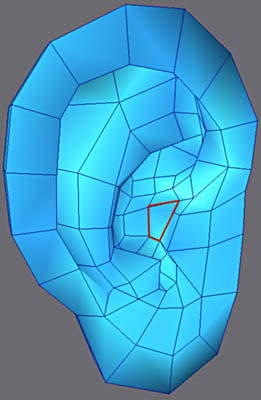
Build the faces marked in red with Create. Do not forget to assign the smoothing group to 1. |
||||
|
||||
Extrude these edges and weld the vertexes with Weld Target. |
||||

|
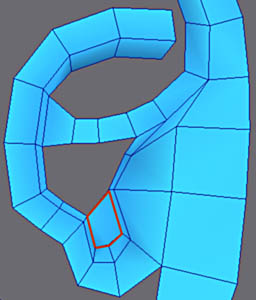
Finally build these faces.
The interior polygon will be used for the end to extrude the beginning of the auditory canal. |
Fill the holes as opposite. |
 |
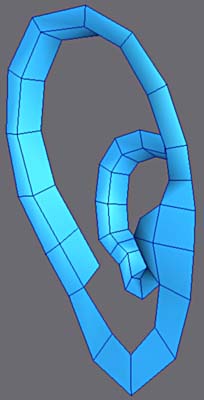
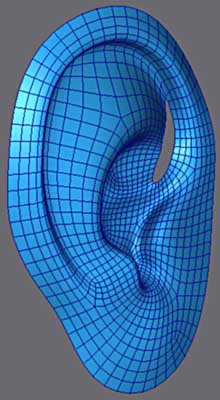
Apply Meshsmooth and make any additonal necessary vertex adjustments |
 |
|
||||
Make adjustments to form a 'nice' ear here the modeling technique relies on your anatomical knowledge, also I advise you to stare at peoples ears around you :) |
||||
|
||||
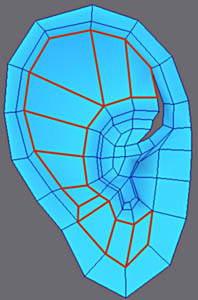
Grid in subdivision 2. |
||||
Fill the hole which remains with quads and triangles. |
 |
|||
|
||||
 |
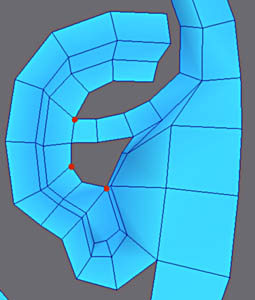
Insert the series of edges (high left).
Select the two vertexes and weld them to remove the triangle Finally select the external edges like opposite. |
|||
 |
Extrude these edges in the direction of the head and made a uniform scale to make the round-off of the ear. |
|||
|
||||
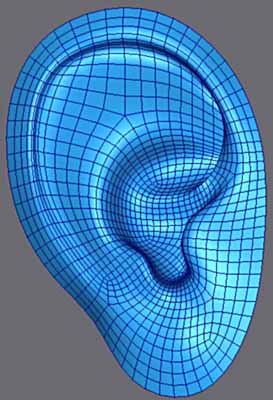
| Select the polygon all at the bottom of the hollow of the ear and make one Extrude and Bevel to make the hole of the auditory canal. On right-hand side seen in subdivision 2 with cage LPM. | ||||

|
||||
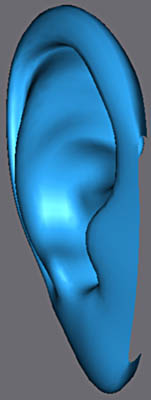
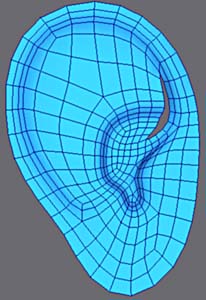
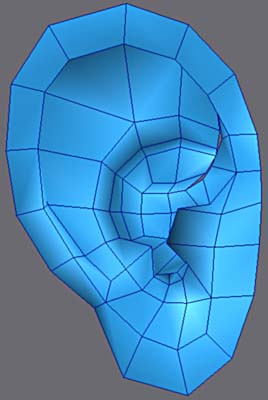
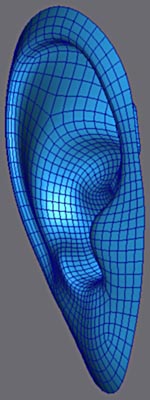
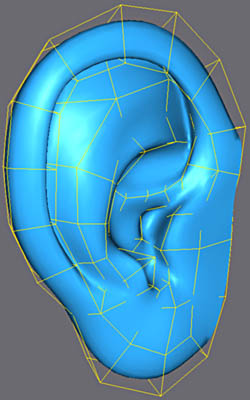
How the ear looks with subdivision 2 before assembly. Put a material with highish specular so you may see the contours of the ear well for any further corrections. The ear must be stylized enough and yet have regular curves. |
||||