Modeling of the body |
|||
Why model the body if the final character has clothes ?
First of all it is a good exercise and you should never miss the opportunity to go in at the bottom of the things and Of course there is no need to make the body with lots of details, thus the feet will be very simplified and the hands will be modeled as gloves. |
|||
 |
|||
As usual use the templates and regulate the size of displayable textures on 512 pixels in Preferences/Viewport/Configure Drivers.
|
|||
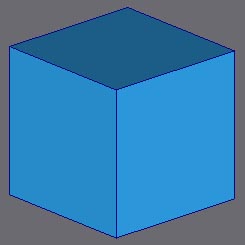
The return of the basic cube :).
As in the Crash Bandicoot LPM tutorial, the base of modeling is a cube, the simplest primitive in 3d... Apply "Edit Mesh" and Collapse Stack. |
 |
||
 |
For the beginning start in left viewport, extrude one face from the cube, like show on picture on the left. Repeat this process and adjust the vertexes.
To see through mesh, activate the mode "See Through" in Properties of the object. A short cut can be configured to pass from one mode to the other, check out Customize/Custumize User Interface and "See Through" Toggle |
||
 |
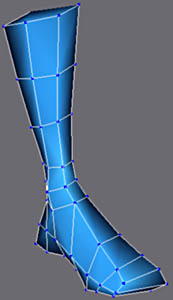
Still in left viewport, extrude the beginning of the leg and adjust the vertexes. |
||
 |
With Cut, insert the edges (left picture) around whole foot. (rotate the viewport so you can cut the opposite side of foot) |
||
 |
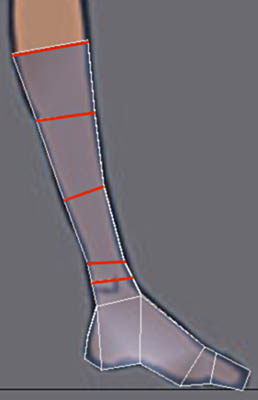
Again add one line for the leg and the heel. (from both sides) |
||
 |
 |
||
Unlike in the tutorial on Crash Bandicoot LPM, here we will use Meshsmooth smoothing while modeling on LPM.
That combines the advantages of the LPM (simple and fast) and the quality of the smoothing of Meshsmooth. Add Meshsmooth modifier. It should be noted that this technique of smoothing is universal since you can find it in most of 3D software FE: Maya, Softimage, Lightwave or Nendo. So the LPM mesh will looks the same in these software after smoothing... |
|||
 |
 |
||
In the stack, click on Editable Mesh and activate the button Show End Toggle Result and go to Vertex mode. That makes it possible to see the mesh low definition (LPM) and the subdivided mesh at the same time. LPM mesh behaves as a cage of deformation of the subdivided mesh .However its one object. |
|||
 |
 |
||
If you would like to temporarily see only LPM mesh , just turn of "show end result" toggle.
In general when you edit the mesh FE adding edges, it is more practical to work with this settings. |
|||
|
|||
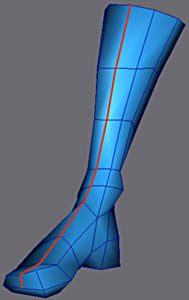
In See Through mode , adjust the vertexes with help of the references on the two sights. Finish the adjustments in User View , use see trough again for so you can see references easily. |
|||
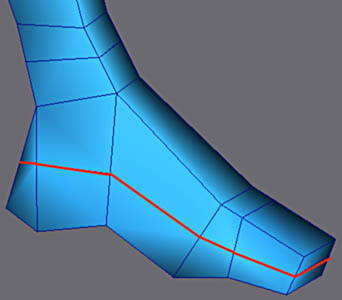
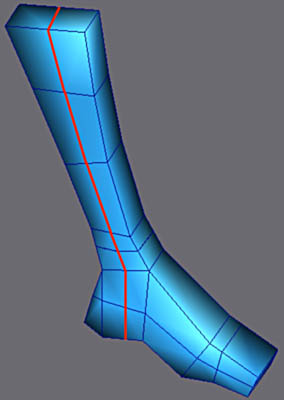
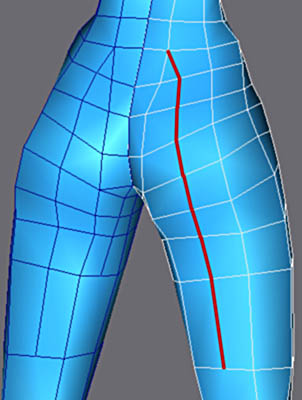
Add a edge which passes by the medium of the foot and goes up along the leg. |
 |
||
|
|||

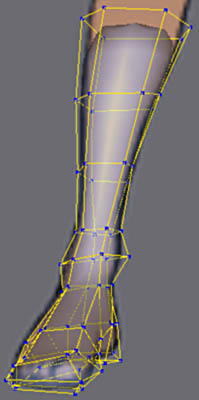
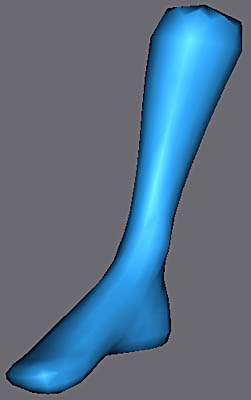
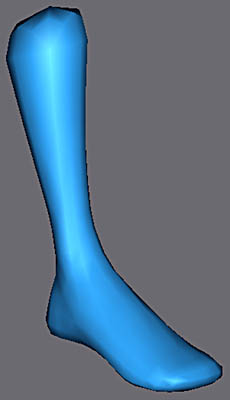
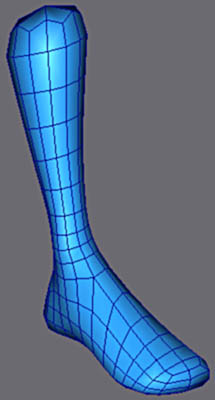
Image of the foot and the beginning of the leg after adjustment of the vertexes.
It should be noted that the orientation of the invisible edges of the faces is not important and does not influence the subdivided mesh. In general try to use as much square faces as possible because that gives best possible smoothing after subdivision. Try to use as few cuts as possible and avoid faces with more than 4 corners... |
|
   |
|
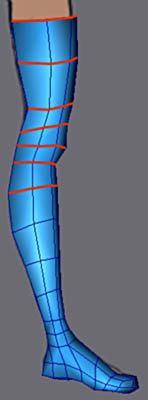
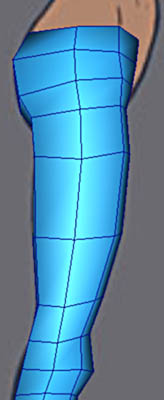
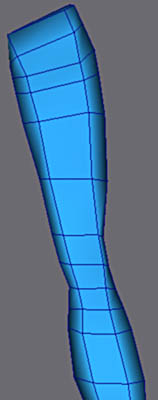
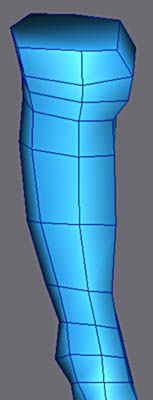
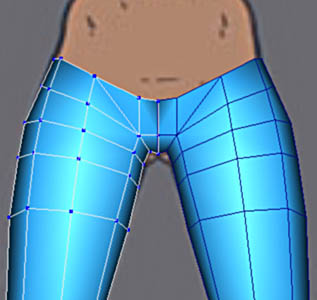
The knee and the thigh are made again with extrusion and adjustments of vertexes. You can mirror reference the leg for better view of it. |
|
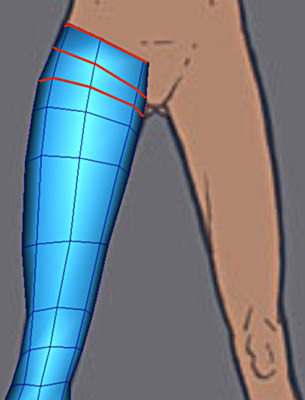 |
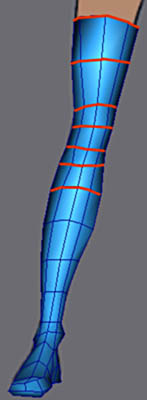
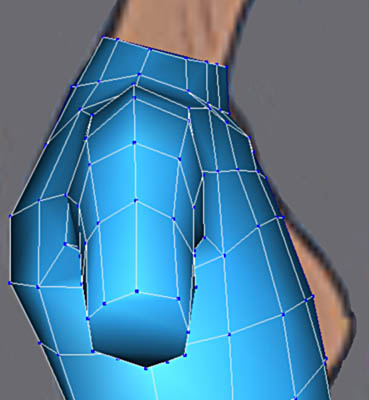
The joint of the leg to the abdomen must be subdivided well to allow a correct folding. |
   |
|
|
|||
 |
Use "weld target" for welding this vertex to the side one.
|
||
 |
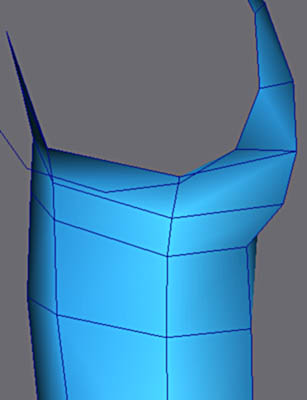
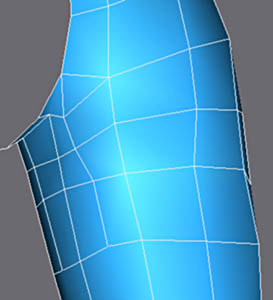
Extrude the resulting polygon. |
||
 |
Select vertexes of this face an scale them in X to 0 so they are in one plane. |
||
 |
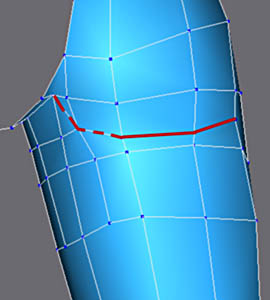
Delete the face and make the spotted line invisible ... (meshsmooth use visible edges for smoothing, try to turn visible on and off while in "show end result mode) |
||
 |
Front view with the mirror reference of mesh |
||
|
|||
|
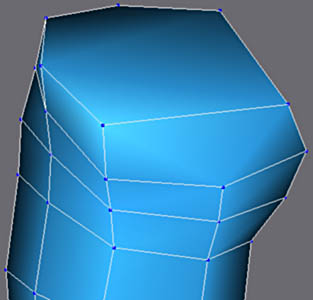
Extrusion of the basin.
Front, left an back view. |
||
|
|||
 |
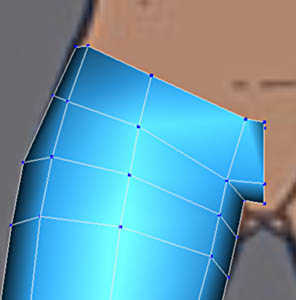
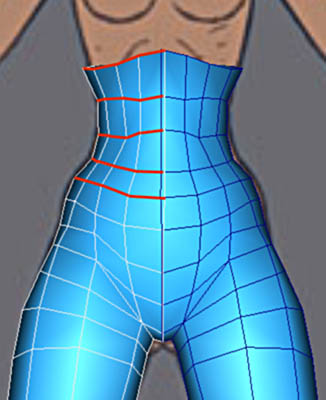
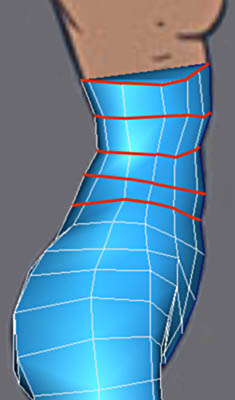
Extrusion of the abdomen.
Front, left and back view. |
||
|
|||

|
|||
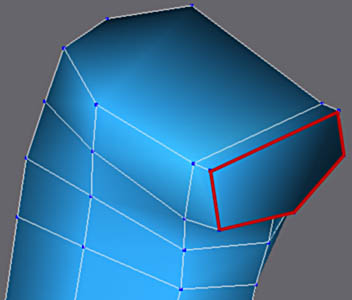
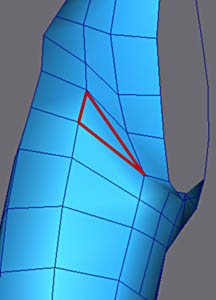
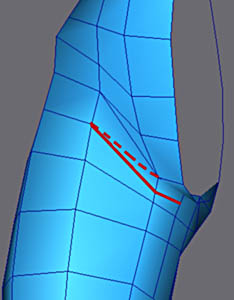
We need to get rid of that triangle because of bad subdivision. Use cut for creating line that correspond with fold line and make doted line edge invisible (right picture) |
|||
|
|||
 |
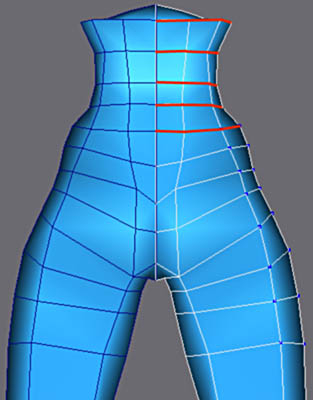
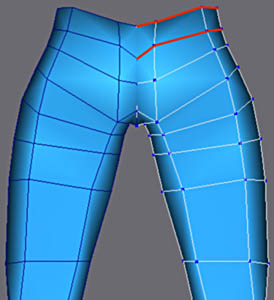
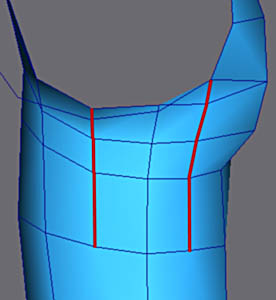
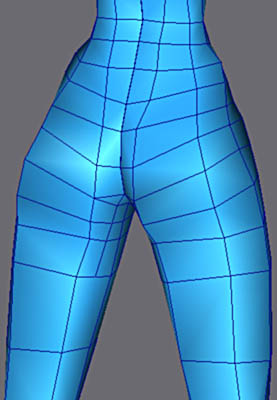
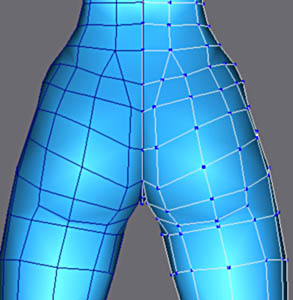
Extrusion was quite fast but the buttocks are not round enough yet .
Two series of Cut Edges allow to round all that. Position the vertical edges regularly around the back and side part of the thigh and the hips. |
||
|
|||
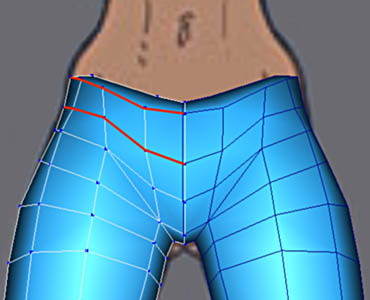
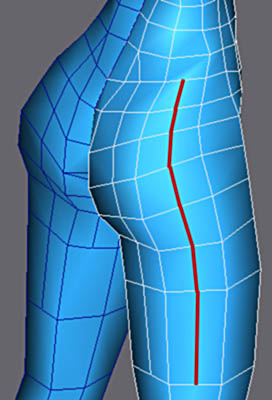
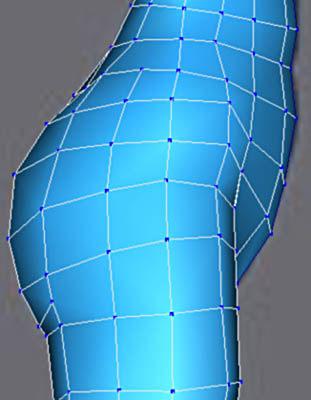
To mark the fold gluteus, add the marked edges and turn them visible (the dotted edges). Make invisible the others to have the same aspect as on the image on right side. |
|||
|
|||
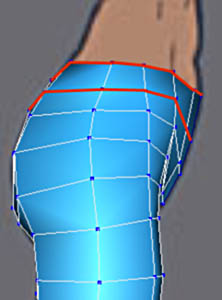
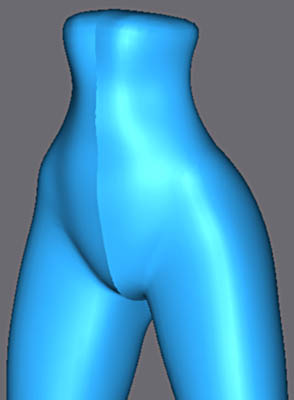
Aspect of the grid of the buttocks seen from back and left. |
|||
|
|||
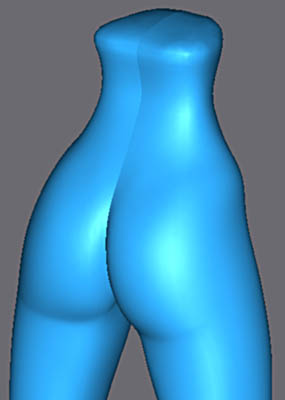
The subdivided mesh, iteration 2 in Meshsmooth. |
|||
|
|||
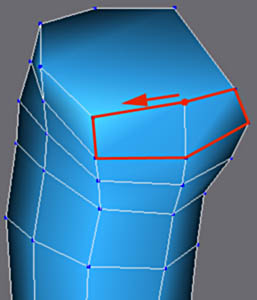
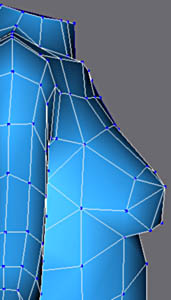
Extrusions for the top of the bust. |
|||
|
|||
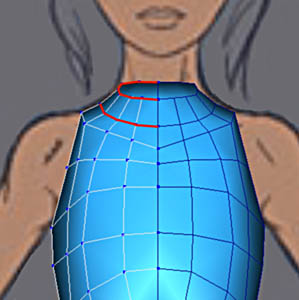
Two extrusions for the start of the neck. |
|||
|
|||
 |
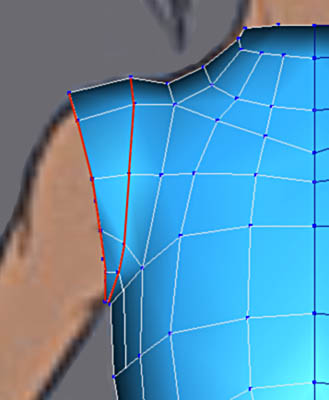
While preparing for modeling of arm, simplify the for faces into one polygons (Weld Target).
Insert the edges (see picture on left) for a better round-off of the arm. |
||

|
|||
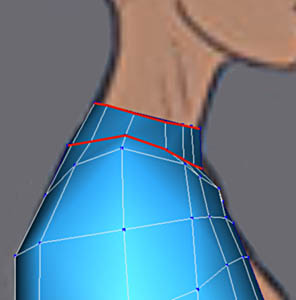
Extrusion of the shoulders. |
|||
 |
|||
 |
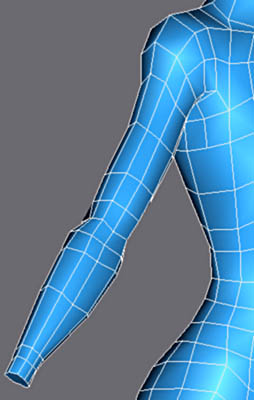
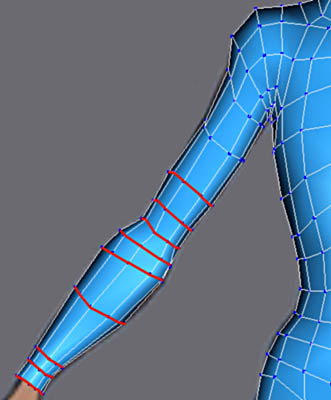
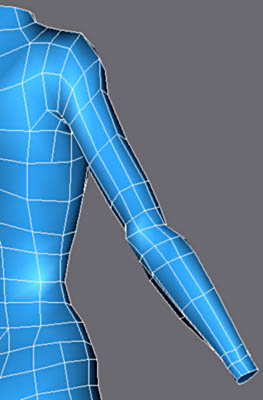
Continue with extrusion of the arm.
This part is make up from group of edges, it is necessary for animation. |
||
|
|||
Continue to extrude elbow and forearm. |
 |
||
|
|||
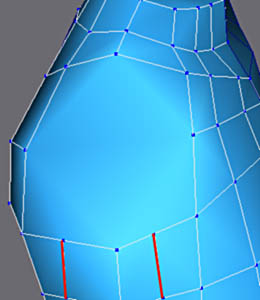
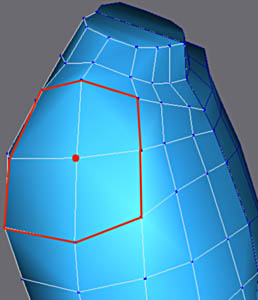
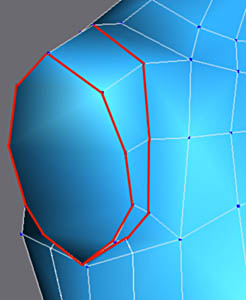
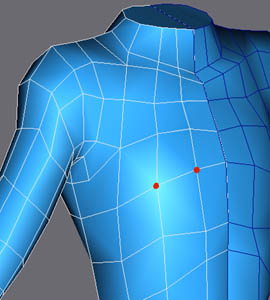
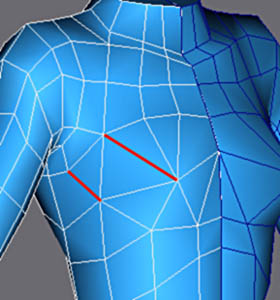
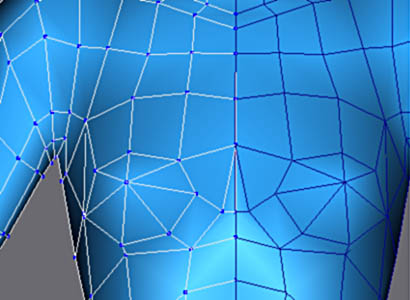
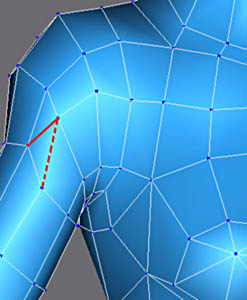
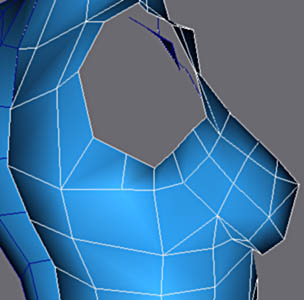
Now we are going to work on breast.
Collapse the two vertexes marked red, and you got the centre point. Make visisible both egdes to outline the base. |
 |
||
|
|||
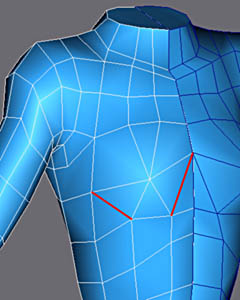
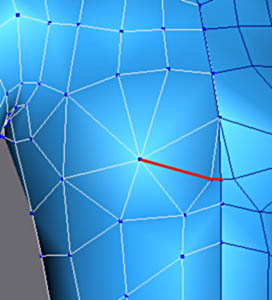
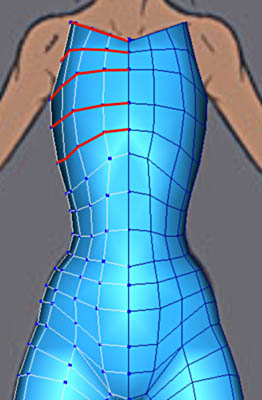
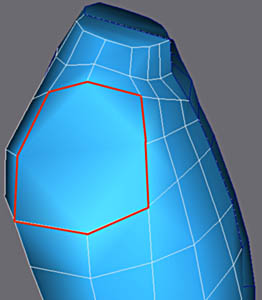
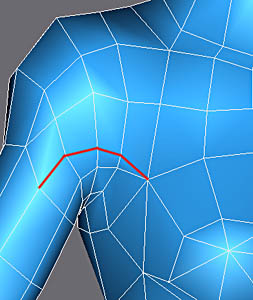
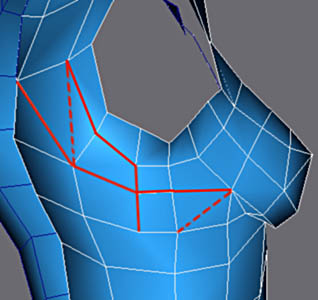
Make visible these edges on the left and on the right picture for a better round-off. |
|||
|
|||
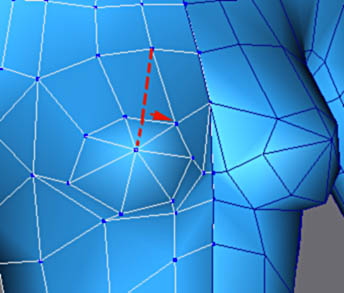
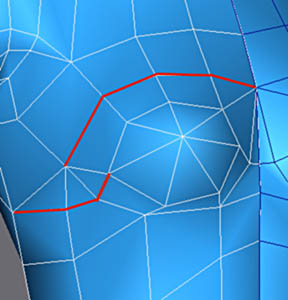
Insert these edges to give a better round-off of profile of the centre. |
|||
 |
|||
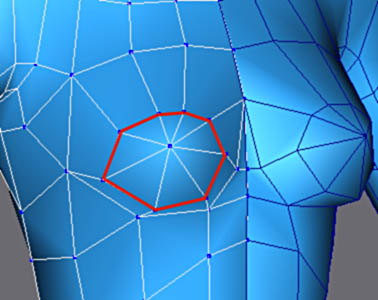
Simplify the geometry with Weld Target to remove the polygon with 5 corners. |
|||
 |
|||
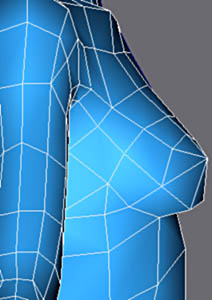
Front view of the chest. |
|||
|
|||
Modify the edges like above, to make visible ( full line ) and invisible (dotted line). Then Insert the edges like on the right. |
|||
|
|||
Insert the edges as on the right image. |
|||
|
|||
Insert the edges and to turn invisible those into dotted to have only quads in this zone. |
|||
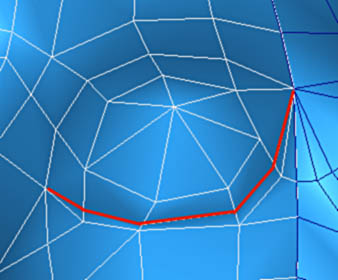 |
Insert edges here to make the fold under breast . |
||
 |
Finally insert these edges and simplify the resulting geometry with Weld Target to remove the triangle. |
||
Mark the median furrow while inserting these edges. |
 |
||
|
|||


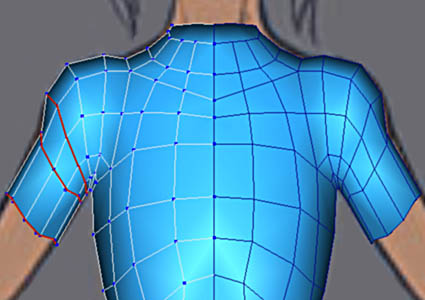
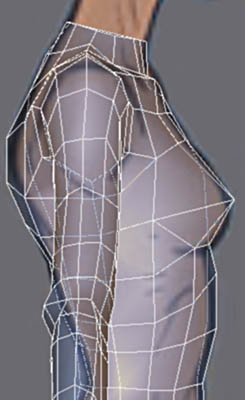
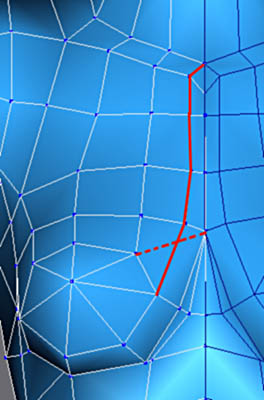
Finally add edges ( full lines ) and make invisible dotted lines to create quads.
There are nothing more but bands of quads for the junction arm-bust, giving best possible smoothing and avoiding concern in animation. Faces of the arm were hidden for better legibility (Hide in the face mode). |
|
   |
|
  |
|
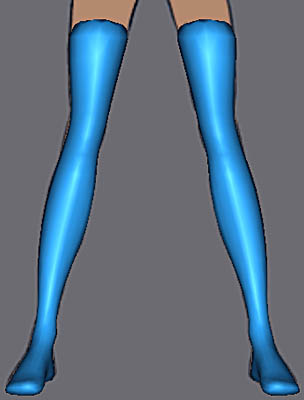
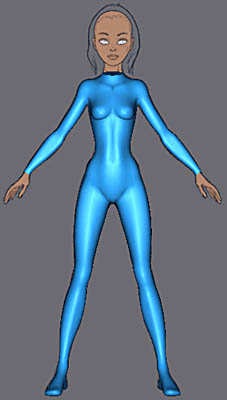
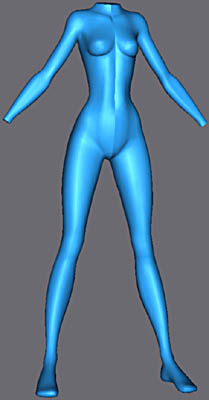
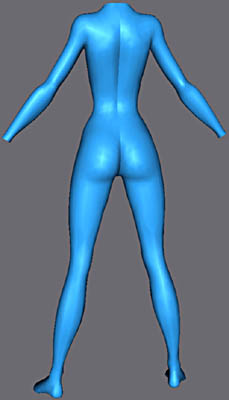
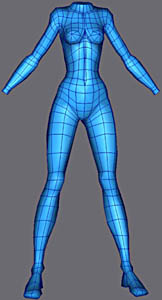
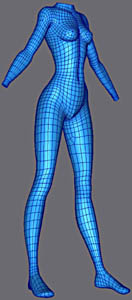
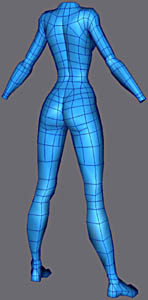
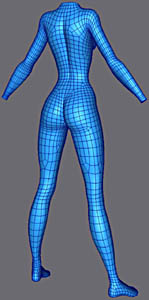
Finished modeling.
Low poly images are above and subdivided ones below (NURMS with iteration 1). Click on the images below to enlarge. |
|
    |
|
  |
|
Do not collapse the stack because the reason of this type of modeling is to achieve low polygon mesh (LPM). Wee will use it for modeling accessories and subdivide it later. |